


Update: i am now selling these bracelets in my Etsy shop here
i'm not really sure why but i really like making friendship bracelets. i almost never wear jewelry and i have a giant pile of them already, but if i ever feel the craftin' itch and i'm not sure what to make...i usually settle for a good ol' fashioned friendship bracelet.
the first time i ever saw someone make a bracelet like this i was in paris and those guys can crank these babies out in seconds! they're really simple to make, all you really need is embroidery floss. i decided to use leather cord for the 'skeleton' of mine and a monkey's fist knot closure (you can use a button instead). i'm not even going to try to explain the knot but the animated tutorial i used is here. if you use the monkey's fist it will take about an extra foot of cord.
once you have picked out your floss, cut them to roughly double the length of the bracelet (if you want a double wrap bracelet cut the floss 4 times your bracelet length). then, with all the floss together as one cord, tie it around the 'skeleton' of the bracelet making sure the short ends point downward. i'm not sure what to refer to the leather part as so i'm calling it the bracelet's skeleton...
to start wrapping, separate the floss color of your choice. pull all the other colors downward and start wrapping the chosen color around the other floss and 'skeleton'. to change colors repeat the process. separate the color you want to switch to, pull all the other floss downwards, and start wrapping. you will see a slight break at the color change.

if you want to get fancy, you can add stripes! just separate 2 colors and wrap as you would normally. this is a little trickier because you have to make sure the floss doesn't get twisted and stays even.

and if you want to get really fancy, you can do this weird little double twist thingy. separate 3 different colors of floss-2 contrasting and 1 background color. start wrapping with the background color as usually but make sure the 2 contrasting colors stay unwrapped. take the first contrasting color and start wrapping it on top of the background color with slight spaces in between. take the second contrasting color and wrap it in the opposite direction. and continue wrapping as normal.

when you get to the end, choose the color you want to end on and trim everything else down. with the last color wrap over the ends of the other floss and tie off. i used some liquid stitch on the ends of the floss just to make sure they stay.
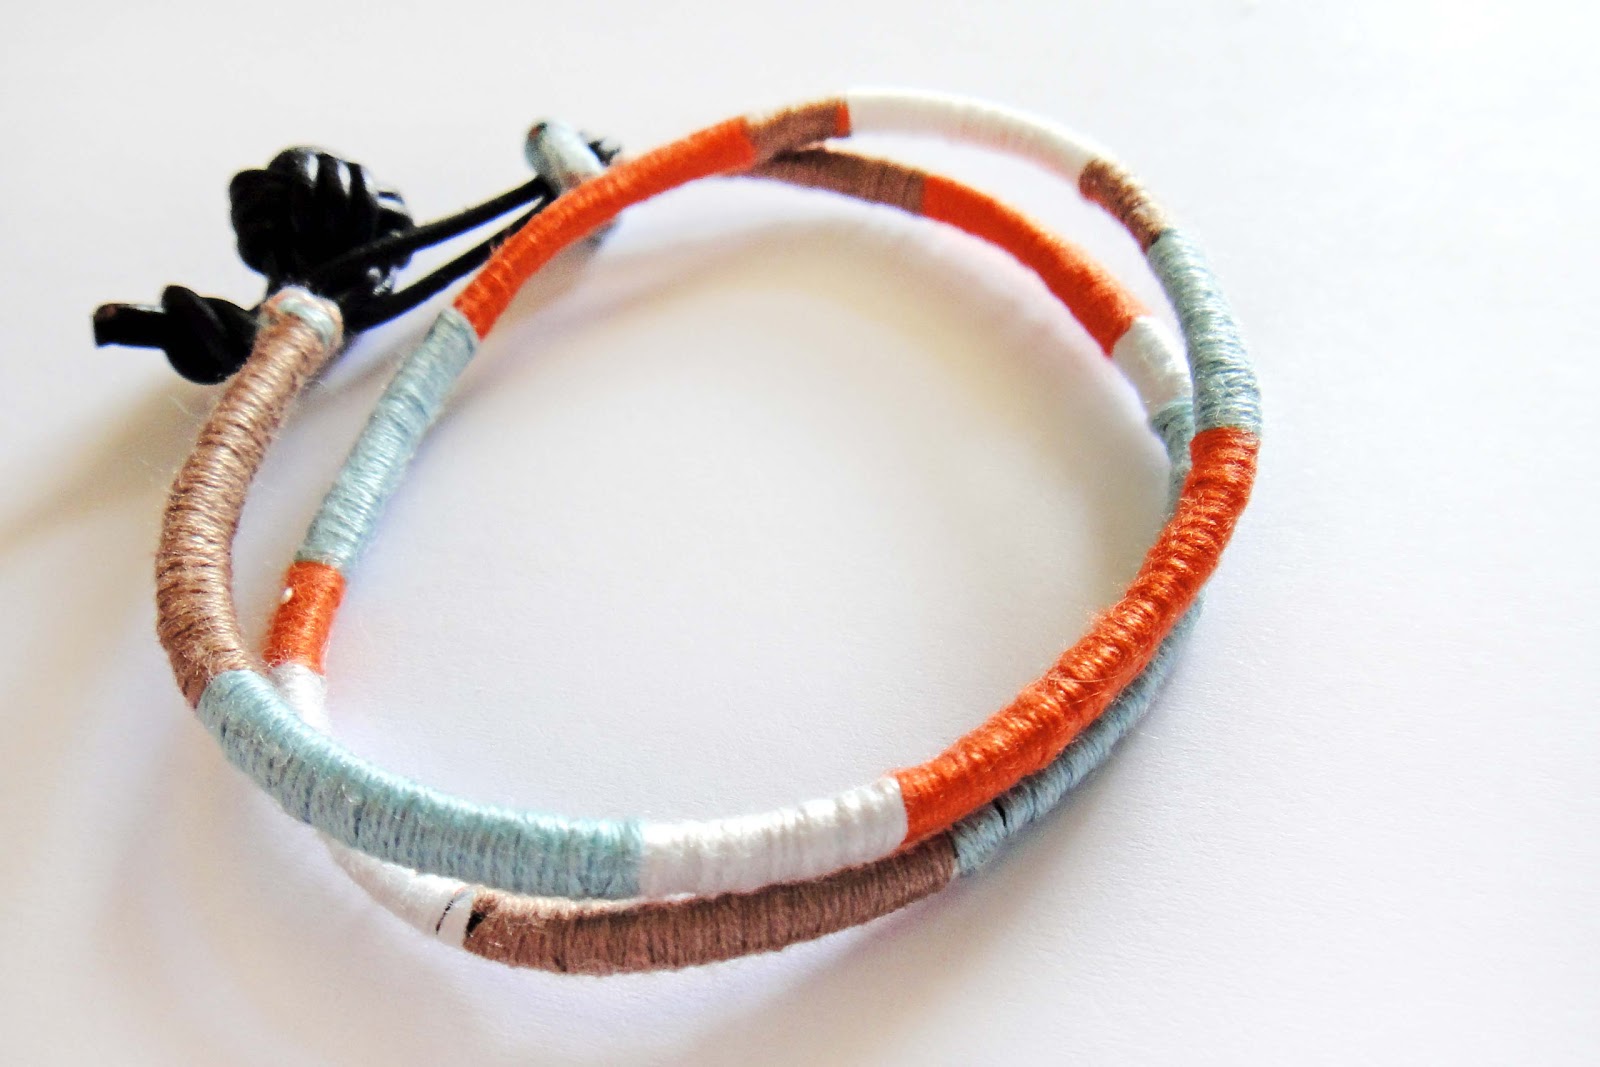
and voila a new friendship bracelet! once you get the hang of wrapping it goes pretty fast, it took me only about 30 minutes to make this double wrap color blocked bracelet. of course, if you use any of those fancy techniques it might take you a bit longer.


linking up with these craftalicious blogs!
My entry into the Share It Link Party at The Winthrop Chronicles is sponsored by Appliances Online and their best Range Cookers.
Thanks for linking up! I'll be featuring this on my blog tomorrow!
ReplyDeletehttp://www.sumossweetstuff.com
Sumo:)
thank you!!
DeleteI like this bracelet! Especially the colors that you chose. I will be featuring this on my blog tomorrow so be sure to check back for the feature post! Thanks for sharing on Marvelous Mondays!
ReplyDeleteJulie
thanks!!
DeleteWow! This brings back memories. I remember making these as a kid. Friendship bracelets were all the rage. Thanks for the great tutorial!
ReplyDeletethank you! and friendship bracelets are still all the rage lol!
DeleteHi, love your tutorial but feel that you should know that the photos have now been loaded onto as a photo tutorial.
ReplyDeleteThis is a lot of fun! I read over the tutorial and immediately tried it out. I'm making my first one and I'm super proud of it! I did rainbow, and it looks gorgeous. Thank you so much for sharing this!
ReplyDeleteWhether you are looking for a diamond to set in a pendant, a pair of earrings, or a diamond engagement ring, Ritani has the perfect diamond selection for you. diamond manufacturer
ReplyDeleteDharam is an Indian diamond manufacturing and design brand, noted for its intricate depiction and precise cuts to produce opulent diamond designs. princess diamond manufacturers
ReplyDeleteI saw this post on how to make a bracelet and I already made one, I also made for my family, Thank you!!Google Maps Citations
ReplyDeleteYour content is consistently top-notch. I always look forward to your posts.
ReplyDeleteWholesale Custom Boxes
Overall, I highly recommend Wholesalecustomboxes for anyone looking for reliable, high-quality custom packaging at competitive prices!
ReplyDeleteAffordable luxury with amazing sparkle. tennis bracelet for women
ReplyDelete