


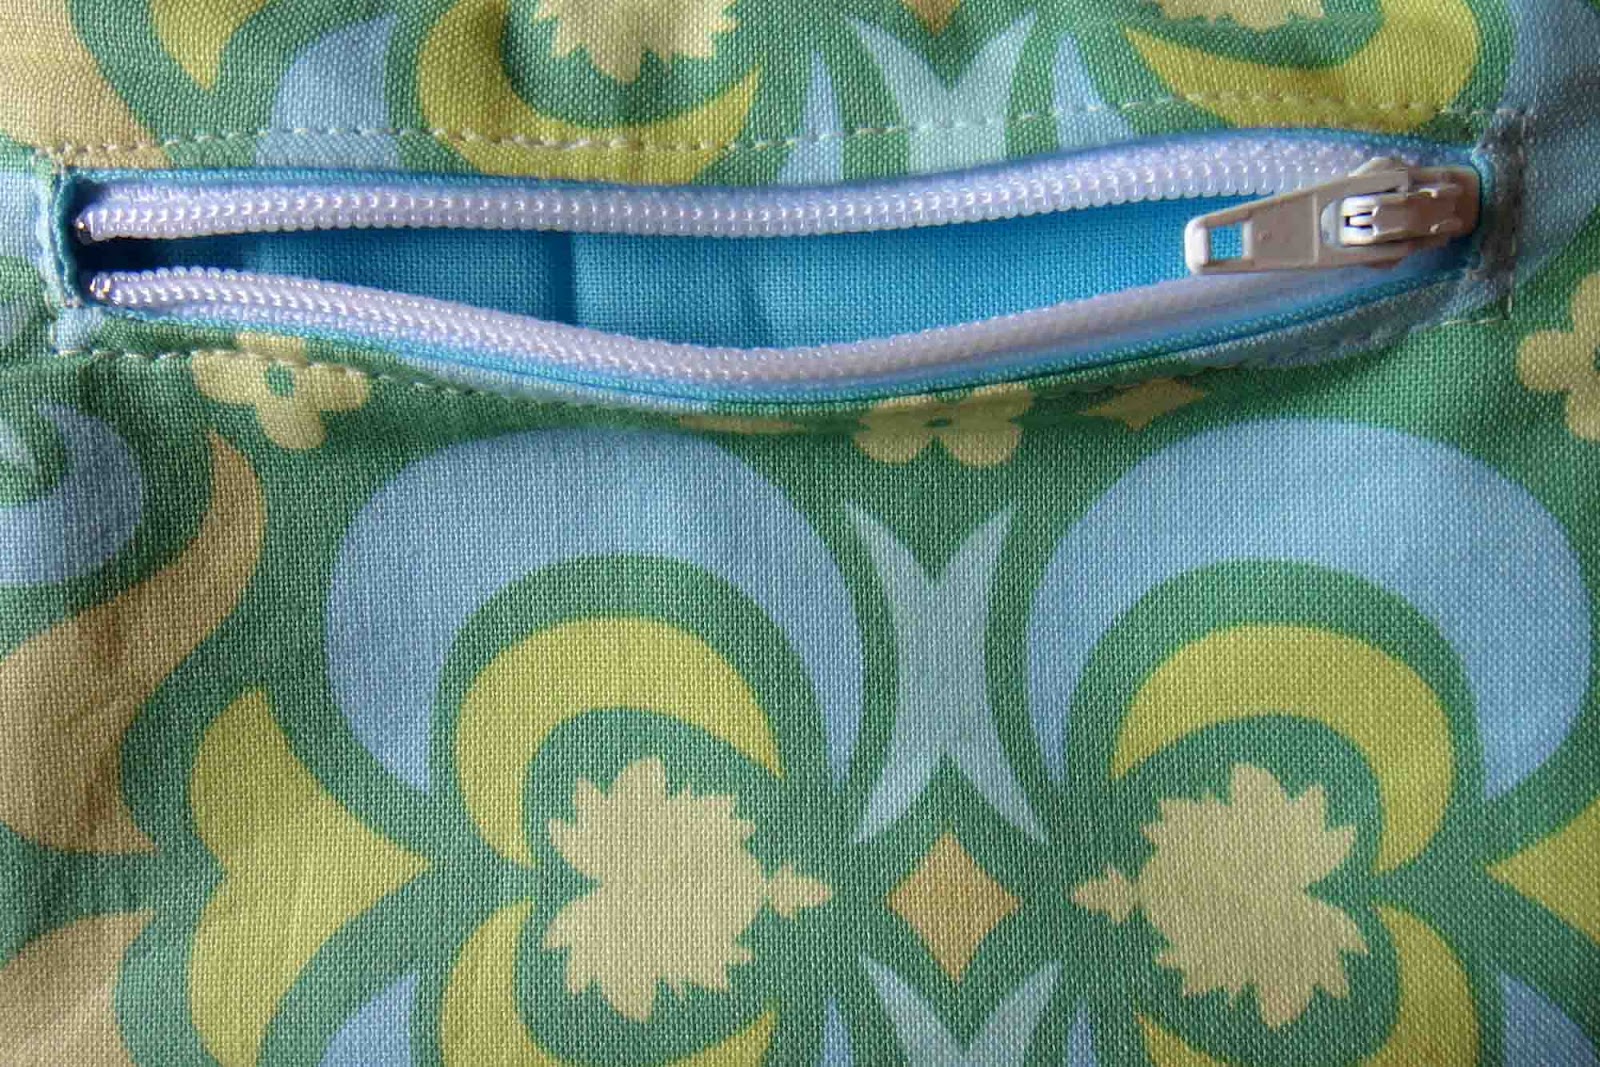
first start by applying interfacing to the outer fabric where you will install the zipper. then mark a rectangle where you want the zipper to be. the zipper i used for this is 4" and i marked a rectangle that is 4"x0.5". then place the outer and lining fabric right sides together, and sew around the rectangle using a smaller stitch. then clip the inside of the rectangle get the corners as close to the stitches as you can without actually cutting them. flip inside out and press. then line up and pin your zipper in place, and top stitch all the way around.


I have never sewed a zipper. I always figured it would be too much trouble. This looks absolutely doable. Thanks for sharing the tutorial. I am going to keep this on hand. I have some sewing projects on my list that might be much improved with a cool zipper pocket!
ReplyDeleteLiz
thanks and happy sewing!!
DeleteAdorei o tutorial!!! Te encontrei no face da Singer! Parabéns...
ReplyDeleteBeijos
Ok i think I'm missing something? Is the rest of the the fabric sewed already or you do this first then sew the pouche, purse ect. Then turn?
ReplyDeleteThe part that wasn't shown was that all the other edges have to be open and you are going to flip one piece of fabric through the whole you cut so there is no raw edge.
DeleteAnd press it before trying to sew on the zipper
DeleteI think I will try using this method for my next project.
ReplyDelete